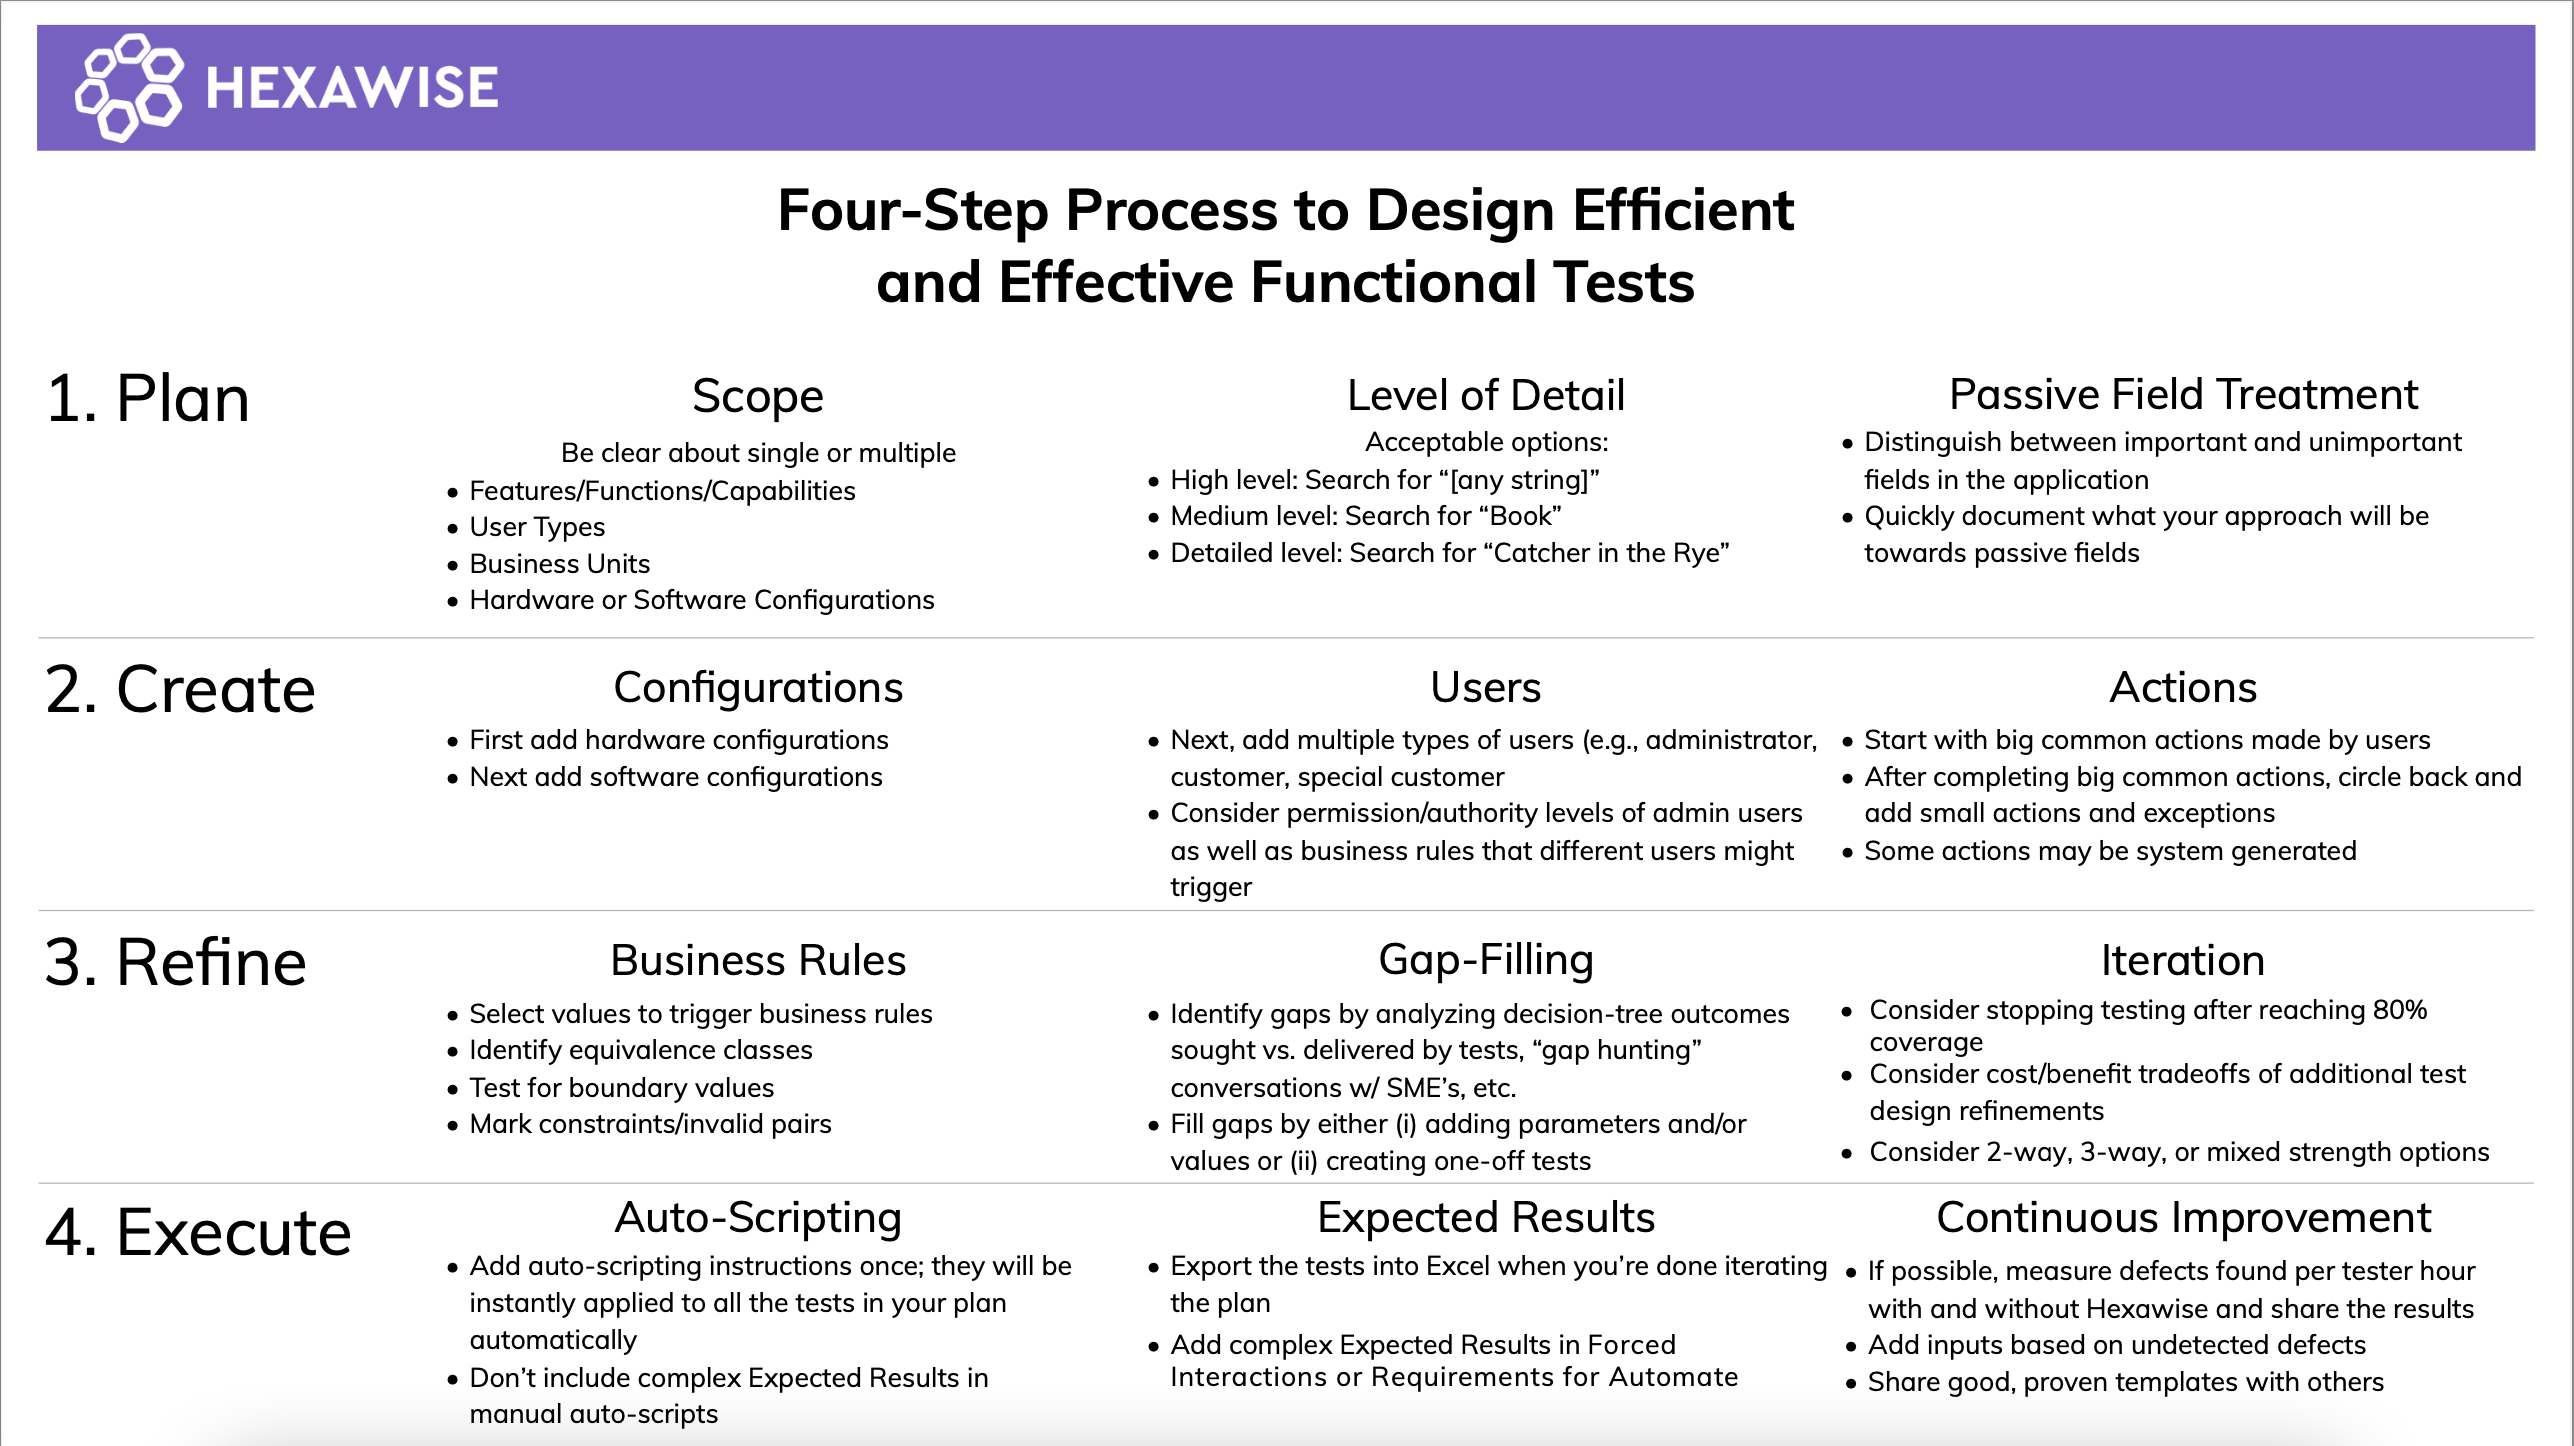
4 Step Process to Awesome Test Plans

Software testing projects can be extremely daunting at first. There are so many moving parts and complexity in a system it can be difficult to know where to start and how to tackle the project. Hexawise testing experts have dealt with this issue countless times and have found this four-step process to help design efficient and effective tests and make software testing projects more manageable. Don't forget to download your testing cheat sheet at the top of the article!
Step Number One: Plan.
Like all projects, you should begin with a plan. First, consider the scope of what you are trying to achieve: what features, functions or capabilities are you trying to test? Are you aiming to test for all the kinds of users who will eventually use your product or only a certain segment? Similarly, are you testing all of the potential hardware and software configurations? Going into a project without a well-defined scope can lead to confusion, over- or under-testing, and unnecessary time and monetary expenditure.
You should also take into account the desired level of detail when drawing up your testing plan. A more detailed approach will produce a greater number of tests but will result in a higher level of coverage. At Hexawise, we describe levels of detail as being part of one of three different tiers: high, medium, and low-level detail, with a high-level project being the most general. In the case of testing a search functionality, a high-level project would test searches for any non-specific string, while a medium-level project would test a more specific string such as “Books”, and a low-level project would test “books written by Stephen King.” By determining your level of detail early, it will be an easier and less ambiguous process to choose parameters relevant to your testing goals.
Finally, distinguish between the important and unimportant variations in your application. A good heuristic is to ask yourself: “Will this variable have an impact on the end result?” If so, it should be included in your tests; if not, you can feel free to leave it out. By filtering your parameters in this manner, you can drastically decrease the complexity of your tests, leading to a more effective and efficient testing process.
Step Number Two: Create
Taking the time to thoughtfully design a well-defined plan makes the next step in the testing process, the creation of your test parameters, simple. Begin by enumerating your different software and hardware configurations. Common and easily implemented categories include the operating system and browser being used to access your product.
Next, add the different categories of users who will be interacting with your product. Different users will have different experiences: some users might be administrators, others will be customers, while others might trigger business rules and have special discounts applied to them. In order to ensure that each of these individual user experiences is tested, be conscientious about enumerating your user categories.
Finish the test design process by parameterizing the actions your users will take when interacting with your product. Because your users’ behaviors are organic, there is no perfect way to systematize their behavior. One approach that successful Hexawise users often take is to begin by thinking about the Big Common Actions that users perform; once these have been enumerated, circle back to the smaller actions and exceptions. Remember, some actions may be system-generated.
Step Number Three: Refine
Once you have created your test parameters, you can begin to refine your tests. There are a variety of ways to improve your testing effectiveness during this step. You can list out all of the business rules that will apply to your product, and create boundary tests to ensure that these rules are being applied correctly in all cases. Or, you can look through your parameters to determine if there are values that cannot co-exist, and mark them as invalid pairs to prevent extraneous tests. It is also important to identify gaps in your coverage using Hexawise’s built-in tools or conversations with those familiar with the software and create parameters or one-off tests designed to address these gaps. Lastly, it is necessary to determine the number of tests to execute, taking into account the level of coverage you will be comfortable with: is 80% coverage acceptable, or would you rather have 100% coverage in 15 more tests?
Step Number 4: Execute
If you are satisfied that your tests are suitable to your needs, you can (finally) begin the process of executing them. Hexawise can expedite this process regardless of your established workflow, providing support for automation with our low-code solution Hexawise Automate, which allows non-coders to create Gherkin frameworks that only require a small amount of “glue” code to function.
Hexawise also has a built-in Expected Results page, which allows you to clearly define the expected results for happy or sad path scenarios. Upon being added, Hexawise recalculates the most optimal way to test all variations, taking your expected results into account.
It is of utmost importance to iterate on your test plans in order to improve and maintain them with time. Consider different levels of coverage, 3- or 4-way testing, or parameter refinement. Your scenarios and Gherkin scripts automatically update whenever changes are made.


